Updated: Feb 28, 2023

Have you ever wondered why you can't seem to get close to the style you leave the salon with when you do it yourself? Your hairbrush may be partly to blame. Hairbrushes are actually the unsung heroes of a flawless 'do. Every type has a purpose, so let's explore how to pick the right brush. It may seem impossible to choose, but we've got the answers for you!
Thermal Brush

Want to look like you've got a fresh salon blowout? Thermals are designed to create smooth body and volume. The barrels speed up drying, hold heat, and regulate temperature to prevent heat damage. The vented barrel helps with heat dispersion and avoids tangles, with the added benefit of reducing frizz or static buildup. Smaller barrels are great for curls, while larger barrels are great for bouncy volume or subtle waves. They're a must-have for people that frequently use a hairdryer. They'll step up your whole blowout game!
Vented Brush
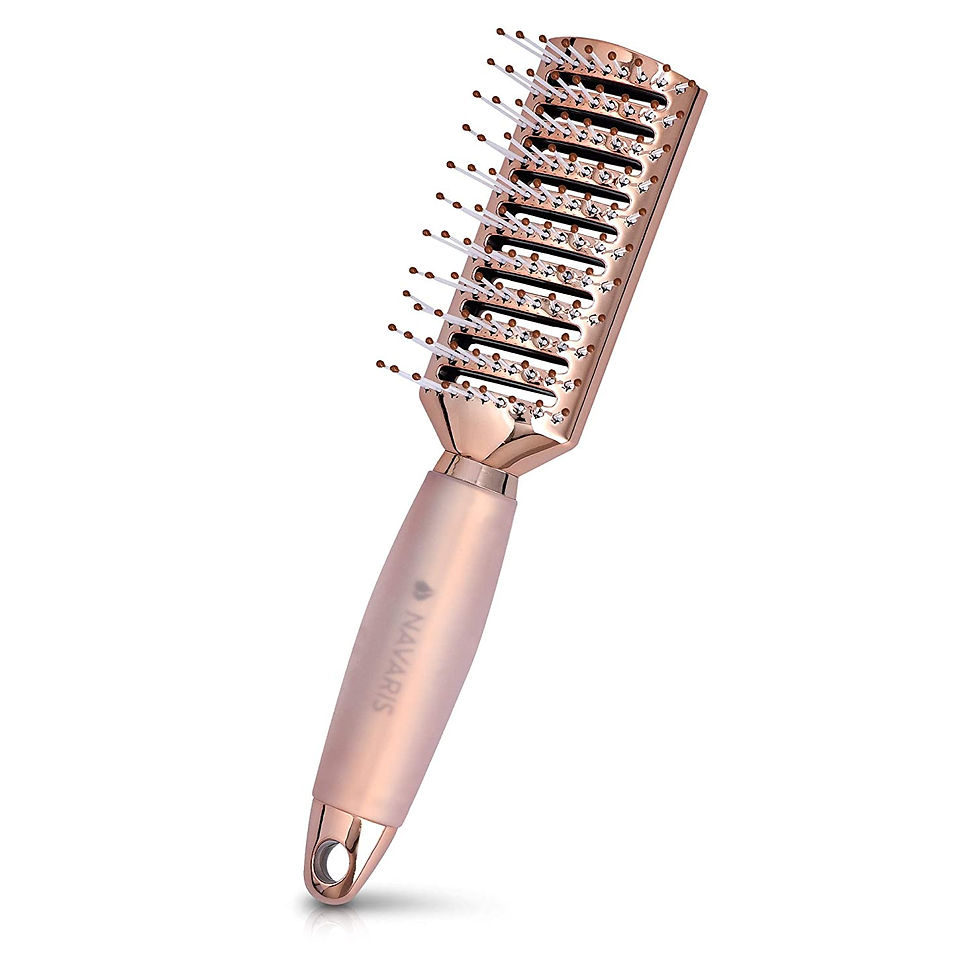
These handy little brushes are great for any hair type. You'd be surprised how much you'll love it! Not only does it speed up drying time due to the vented back, but the heat can reach all angles, which prevents additional heat damage. It's also the brush of choice for stylists when brushing freshly curled hair after it has cooled down. Whether you choose a curved or paddle style brush, you can't go wrong.
Curved Brush

These brushes are great for evenly distributing your hair's natural oil. They cut down on drying time, and we all love that! It grabs more hair at one time than another type of brush would, pulling it more consistently into place. The curved design shapes easily to your scalp and head. They're great for detangling, styling, blow drying, and blowout touch-ups. These are also a must-have for those of us rocking hand-tied extensions.
Boar Bristle Brush

A good boar bristle brush can change the game up. They polish the hair by distributing the hair's natural oils from root to tip and lessen breakage during styling. It creates a shine by closing the cuticle. These are great for everyone, but they're a must-have for styling curly or fine hair. These are very gentle on your scalp and tresses. A thinner boar bristle brush is also great for teasing to add volume at the root. One of the biggest benefits is that they remove dead strands, leaving you with healthier hair.
Paddle Brush

Paddle brushes are great for everyone! It’s a must-have in any hair care routine, but it's a particularly good option for long, thick, or naturally straight hair. It's perfect for detangling, smoothing, and polishing. This makes them even more valuable in winter! Those oversized sweaters are amazing, but the static often means your hair just won't behave. A paddle brush is the answer! To smooth hair most effectively, use when drying your hair. Begin drying your hair with the brush needed for your desired effect until your hair is about 80-90% dry, then finish it off with a paddle brush. This will keep your locks looking silky smooth.
Wide-Toothed Comb

Everyone needs a good wide-toothed comb in their beauty kit. It can tackle almost anything! They're great for everything from loosening curls after setting to distributing your conditioner or hair mask in the shower. The thick teeth and wide gaps get out knots with ease. They're great for separation on dry hair. These are an absolute must-have for thick or curly hair. People with a lot of hair will breathe sighs of relief once they try this game-changer. It allows the hair to easily flow through and give you a seamless finish.
Detangling Brush

Detangling brushes are designed to be used on wet or dry hair, and even while you're in the shower! The flexible bristles remove knots and tangles without breakage. This brush is great for everyone, but if you have textured or curly hair, this is definitely a brush for you. You can rest assured that your hair won't pull, tug, or snag. The widely spaced bristles unlock knots like magic! Make sure to detangle from the ends and work your way up to get the best result.
Now that you have the complete guide to hairbrushes, you can live your best life! Say goodbye to bad hair days and hello to your new flawless style. Who says you can't have a DIY salon-style 'do at home? Your selfie-ready hair is right around the corner. Follow this hairbrush guide and you'll be rocking that perfect style in no time!